Quick Tip: Image Resize Prep for Training
When designing and working with neural networks, a common requirement is having a fixed image dimensions for inputs... By handling the image resizing beforehand, the training phase will be able to progress without as much overhead and thereby allow for tighter feedback loops.

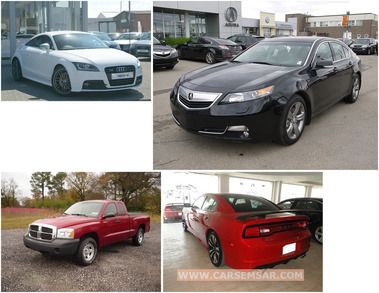
(Image from techsparks.co.in)
Background
When designing and working with neural networks, a common requirement is having a fixed image dimensions for inputs. Having been working recently on exploring AAEs (adversarial autoencoder neural networks), I ran into this need while working with a Kaggle data set of car images.
Like most data sets, the Stanford Cars Dataset includes two folders with many images–approximately 8,000 for each in this case. In browsing through the files, I could quickly see that the images had different dimensions (as seen below). The goal, therefore, was twofold: find a reasonable aspect ratio (and size) based on all of the images and then batch resize all of them. By handling the image resizing beforehand, the training phase will be able to progress without as much overhead and thereby allow for tighter feedback loops.
Find Proper Size & Aspect Ratio
To determine an appropriate size and aspect ratio for the images, some basic statistics of all 16,000+ images are needed. Although the file command does print out the dimensions of the given image, it fails to actually extract the given information:
❯ file cars_train/00001.jpg

cars_train/00001.jpg: JPEG image data, JFIF standard 1.01, resolution (DPI), density 72x72, segment length 16, baseline, precision 8, 600x400, frames 3
Thankfully, ImageMagick's identify command does just this. If you haven't used ImageMagick, I would highly recommend installing it and becoming familiar with its tools from convert to montage. With identify, even the specific dimension–width or height–can now be specified.
❯ identify -format %w cars_train/00001.jpg
600

❯ identify -format %h cars_train/00001.jpg
400
Using ls and xargs (with a little bit of bash command line piping), this command can be performed against all of the images in a given folder.
❯ ls cars_train/* | xargs -L1 identify -format "%wx%h\n"
600x400
900x675
640x480
2100x1386
144x108
575x431
640x480
639x480
1280x843
640x480
...
For those unfamiliar with xargs, it essentially allows customization of what happens with the bash pipe operation. In this case, we pass it -L1 to indicate that the command should be run on every line. By default it passes the input as the last argument to the specified command.
# Iterative calls from xargs
identify -format "%wx%h\n" cars_train/00001.jpg  # first time
identify -format "%wx%h\n" cars_train/00002.jpg  # second time
identify -format "%wx%h\n" cars_train/00003.jpg  # third time
...
The format %wx%h\n simply tells identify to print width + "x" + height + newline for each image.
Although this command does print all of the dimensions, the goal here is really to get a sense for the average, min, and max values for width and height in order to make a good decision about what a happy medium is for the given images. For this final step, then, the datamash command gives an easy way to perform basic statistics by just piping numbers into it. (Check out GNU datamash website for easy installation.)
# Pipe five through ten into datamash for basic stats
❯ seq 5 10 | datamash min 1 max 1 mean 1 median 1
5       10      7.5     7.5
Armed with all of these individual commands, the statistics for width and height can now be easily obtained.
# Stats for width
❯ ls cars_**/*.jpg |
  xargs -L1 identify -format "%w\n" |
  datamash min 1 max 1 mean 1 median 1

78      7800    700.49255483472 640

# Stats for height
❯ ls cars_**/*.jpg |
  xargs -L1 identify -format "%h\n" |
  datamash min 1 max 1 mean 1 median 1

41      5400    483.24584491813 426
Wow. With only two lines of bash commands, the min, max, median, and mean dimensions of 16,000 images have been obtained. I personally find this to be a compelling argument for not only using bash where needed but investing more time in it to learn some really fantastic tools. Looking at this output, it seems that the standard size of 640x480 may be a decent size to employ.
Batch Resize 16k Images
Perhaps not surprisingly at this point, ImageMagick is the tool to turn to yet again. Its mogrify command is just what is needed. The goal here is to resize all images with a scale-to-fit, centered approach and add a neutral background to fill as needed. Additionally, copies of the images are desired so that later they can be used at full resolution (or resized to a different size).
Since the split of the training and test folders are still relevant, this resizing command should be run in each directory. Due to how mogrify works, the subfolder for this images need to be created separately:
mkdir cars_test/resized
mkdir cars_train/resized
Inside of each folder, the mogrify command can now be run.
mogrify -resize 640x480 \  # resize to this size
        -background gray \ # fill with gray as needed
        -gravity center \  # keep image centered
        -extent 640x480 \  # set the image size
        -format jpg \      # keep jpg format
        -path resized \    # put images in a subfolder (no overwrite)
        *.jpg              # files to resize
After pulling a shot of espresso or taking a short walk, the files should be now resized for processing without the overhead of resizing on-the-fly or writing a bunch of Python hoping that you won't run out of memory!
Using in the Data Science Process
If you have read thus far, you may be excited to try and reduce the amount of Python required for image processing. As a software engineer who values maintainability, I highly recommend capturing these commands at least for documentation if not in a shell script. Here's how I might capture it if this Kaggle data set was a real project at my company.