
Deploying Your Data Science Projects in JavaScript


Pushing a React client, Python JSON API, and SSL certificate from Let's Encrypt to DigitalOcean in an hour
For my latest project, I decided to use React for most of my exploratory data analysis (EDA) and needed a drop-dead simple JSON API for serving up the necessary data to avoid loading a +70 MB page. In this tutorial, I'll walk you through the process of deploying a sample app with create-react-app, fastapi, and Nginx on DigitalOcean. You can explore the real app as it currently stands at https://ecce.rcd.ai. The production deploy process for this is a bit manual, but it certainly could be automated if needed.
Here are the top-level steps to make this happen:
- Create the Python API with fastapi
- Create the client app with create-react-app (and pass requests to the API)
- Create DigitalOcean droplet and install dependencies
- Configure Nginx (to unify React and Python as single web service)
- Build client app and copy to droplet
- Clone client API and install as cronjob
- Setup domain and obtain SSL certificate from Let's Encrypt
- Grab a coffee ☕ for a job well done! 🎉
Python API with fastapi
As far as I know, fastapi is pretty much the easiest, fastest way to create a Python API. It's a one file server and can be easily expanded and configured as necessary. For this example, we'll be serving up verses from the ESV (legally permissible since this a non-commercial project). We'll start the project from scratch with these commands:
# Create directory and jump into it
mkdir -p fastapi-react-demo/app
cd fastapi-react-demo

# Download data source
curl -LO https://github.com/honza/bibles/raw/master/ESV/ESV.json
mv ESV.json app/esv.json

# Install dependencies
pip install fastapi uvicorn toolz

# Save dependencies for later use
pip freeze | grep "fastapi\|uvicorn\|toolz" > requirements.txt

# Create server file
touch app/server.py
In app/server.py:
from fastapi import FastAPI
from starlette.middleware.cors import CORSMiddleware
import json
import os
from toolz import memoize

app = FastAPI()

# TODO: Change origin to real domain to reject Ajax requests from elsewhere
app.add_middleware(CORSMiddleware, allow_origins=['*'])

@memoize
def data():
    with open(os.path.join(os.path.dirname(__file__), 'esv.json')) as f:
        return json.load(f)


@app.get('/api/verse/{book}/{chapter}/{verse}')
def load_text(book: str, chapter: int, verse: int):
    try:
        return {'text': data()[book][str(chapter)][str(verse)]}
    except KeyError as e:
        return {'error': str(e), 'type': 'KeyError'}
From this simple file, we have a JSON API, CORS, parameter validation, and so much more. Let's go ahead and run this in development mode to check things out:
# Start app
uvicorn app.server:app --reload

# Send API request (in separate window)
curl http://localhost:8000/api/verse/Genesis/1/1
# => {"text":"In the beginning, God created the heavens and the earth."}
With the server running, we not only have the JSON API fully operational in development, but it even live reloads if we change anything in that file. Let's move onto the client.
Client app with create-react-app
With the API running in development mode, let's go ahead and create a client app. I am going to assume familiarity with the JavaScript ecosystem if you're doing data science visualizations in React.
npx create-react-app clientBefore adding our ajax code, we'll need to configure the proxy for create-react-app to forward requests it doesn't handle to our API server running on port 8000.
In client/package.json
  ...
  },
  "proxy": "http://localhost:8000",
  "scripts": ...
We'll go ahead and do a simple API call from the client:
In client/src/App.js
import React, { Component } from 'react';

class App extends Component {
  constructor(props) {
    super(props)
    this.state = { verse: 'Loading...' };
  }

  componentDidMount() {
    fetch('/api/verse/Genesis/1/1')
      .then(r => r.json())
      .then(data => this.setState({ text: data.text }));
  }

  render() {
    return (
      <div>
        <h1>fastapi-react-demo</h1>
        <p>Result of API call: {this.state.text}</p>
      </div>
    );
  }
}

export default App;
With that file updated, we can go ahead and start up the server.
cd client && yarn start
Hurray! It's certainly not going to win any design awards, but we now have the two apps talking to each other. Let's talk about how to actually deploy these apps.
Make sure you have pushed this up to a Git repository that we can easily clone later. (If not, don't worry–you can just use the sample repository at https://github.com/rcdilorenzo/fastapi-react-demo).
Deployment
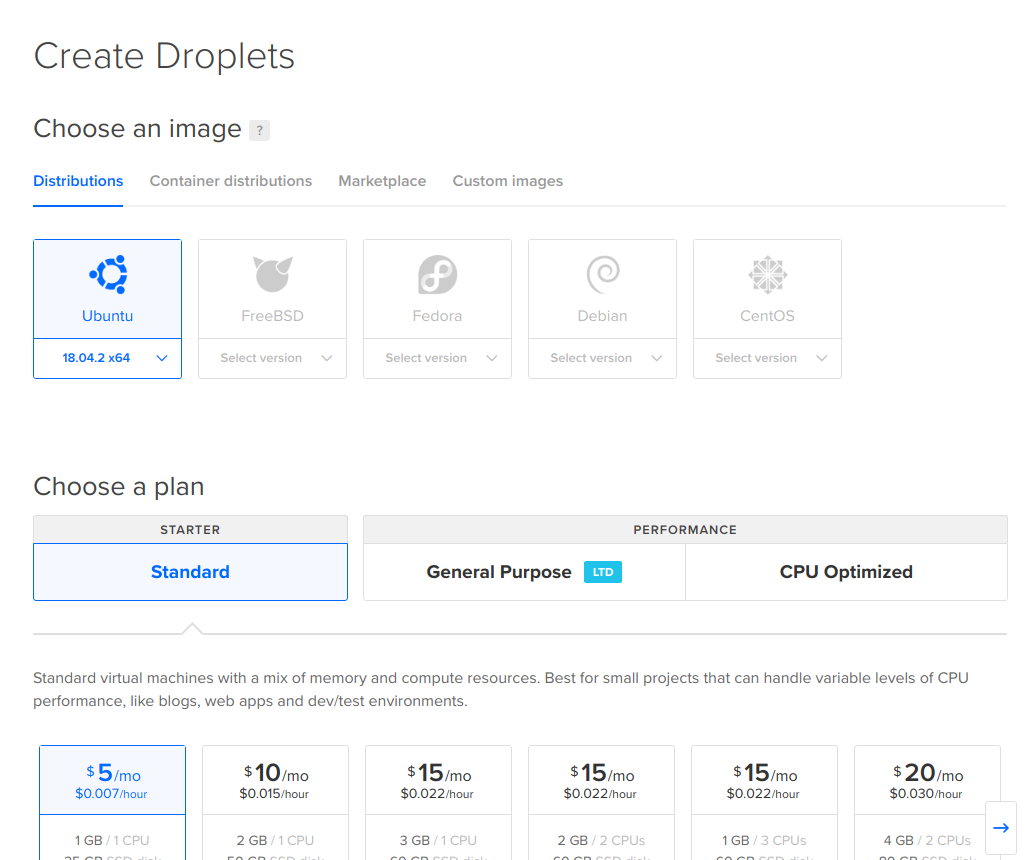
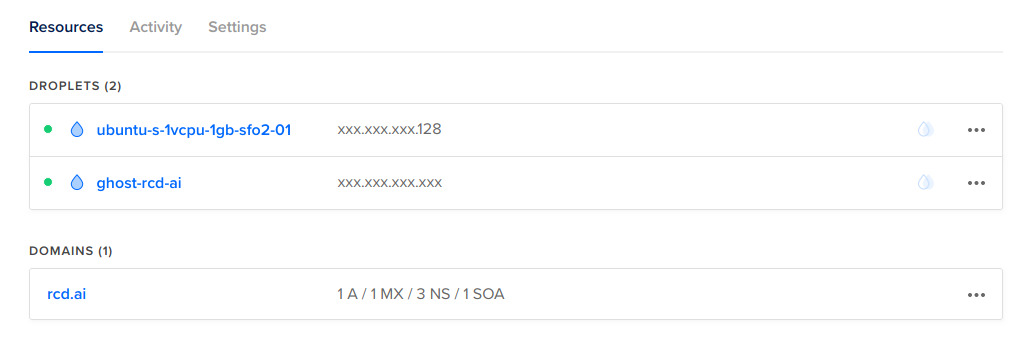
With the app up and running, we now have to deploy our code for the world! We'll start by creating a DigitalOcean droplet. In this case, I'll choose the smallest disk size with Ubuntu 18 to serve the application.
With the SSH keys in place, we can go ahead and jump into the droplet described in the settings.
ssh root@<DROPLET_IP xxx.xxx.xxx.128>

# (on server)
apt-get update
apt-get install -y nginx-full
Configure Nginx
We now need to setup Nginx to accomplish three items.
- Serve Python app whenever route starts with
/api - Fallback to React app for any specific asset or if a route isn't found
- Force SSL and use certificate from Let's Encrypt
I'm not going to jump through all of the details of this configuration, but it should accomplish our goals and you learn more about the details later. For editing, go ahead use your favorite command line editor. (Mine is vim for quick edits; easiest is nano.) Be sure to replace demo.rcd.ai with your custom domain.
In /etc/nginx/sites-available/demo.rcd.ai.conf
server {
    listen [::]:80;
    listen 80;
    server_name demo.rcd.ai;
    location / {
        return 301 https://$host$request_uri;
    }
}
server {
    listen [::]:443 ssl http2;
    listen 443 ssl http2;
    server_name demo.rcd.ai;
    access_log /var/log/nginx/access.log;
    error_log /var/log/nginx/error.log;

    ssl_certificate /etc/letsencrypt/live/demo.rcd.ai/fullchain.pem;
    ssl_certificate_key /etc/letsencrypt/live/demo.rcd.ai/privkey.pem;

    root /var/www/demo/;

    index index.html;

    location / {
      try_files $uri $uri/ /index.html;
    }

    location /api {
      proxy_pass http://localhost:1234; # Port of Python server
    }

    # JavaScript/CSS
    location ~* \.(?:css|js)$ {
        try_files $uri =404;
        expires 1y;
        access_log off;
        add_header Cache-Control "public";
    }

    # Any file route
    location ~ ^.+\..+$ {
        try_files $uri =404;
    }
}
Let's also symlink this file into the sites-enabled folder so that Nginx will know to serve it when receiving requests from the domain demo.rcd.ai.
ln -s /etc/nginx/sites-available/demo.rcd.ai.conf /etc/nginx/sites-enabled/demo.rcd.aiAlthough we could go ahead and tell Nginx to reload, we still have a couple of things remaining before it will work properly.
- Add
demo.rcd.aiwith our domain registrar to point to this IP address - Copy the production build of the client to
/var/www/demo - Clone the Python server and start it on port 1234
- Request Let's Encrypt certificate
I won't go too much into the details of setting the A record of a subdomain as it depends on your provider. Here's what I added to NameCheap since that's my registrar.
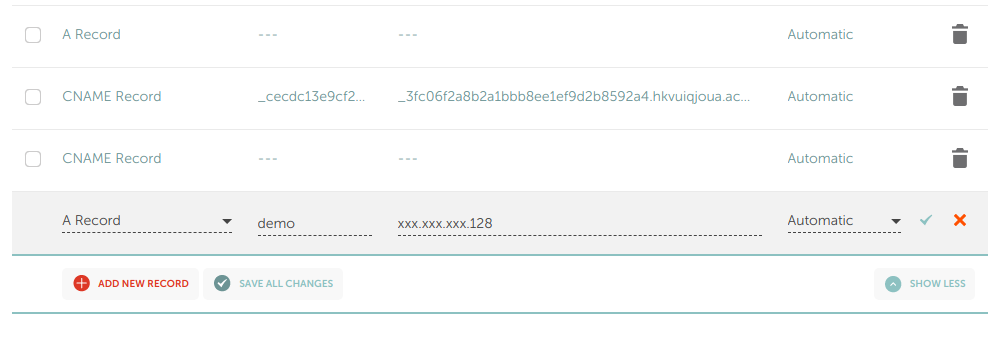
Note that this may take a while before the change is reflected across the "interwebs." You can always check it with a simple ping:
❯ ping demo.rcd.ai
# PING demo.rcd.ai (159.89.130.128) 56(84) bytes of data.
# 64 bytes from 159.89.130.128 (159.89.130.128): icmp_seq=1 ttl=48 time=88.4 ms
# 64 bytes from 159.89.130.128 (159.89.130.128): icmp_seq=2 ttl=48 time=85.4 ms
# ^C
# --- demo.rcd.ai ping statistics ---
# 2 packets transmitted, 2 received, 0% packet loss, time 1000ms
# rtt min/avg/max/mdev = 85.411/86.921/88.432/1.539 ms
Build and Deploy Client
Back in the client/ folder on the development machine, creating a production build is as easy as issuing a single command. We'll then package it up and send it to the DigitalOcean droplet in the /var/www/demo directory.
# Build production-optimized assets
yarn build

# Zip contents
zip -r build.zip build/

# Upload with scp
scp build.zip root@<DROPLET_IP>:/var/www/
Then on the droplet:
# Unzip and rename folder
apt-get install -y unzip
cd /var/www && unzip build.zip
mv build demo
At this point, Nginx should serve the assets properly. However, because the certificate isn't in place yet, it won't allow us to even load the configuration.
SSL Certificate from Let's Encrypt
Although we could setup the Python server, it would be nice to get some feedback to make sure at least our client is being served properly. In the spirit of quick iteration, let's setup that certificate first. Instructions are easily obtainable from https://certbot.eff.org. On the droplet, go ahead and install certbot.
apt-get update
apt-get install software-properties-common
add-apt-repository universe
add-apt-repository ppa:certbot/certbot
apt-get update
apt-get install certbot python-certbot-nginx
From here, the certificate can be obtained via a single command.
certbot certonly --standalone \
  --pre-hook "service nginx stop" \
  --post-hook "service nginx start" \
  --preferred-challenges http -d demo.rcd.ai
# ...
# Running pre-hook command: service nginx stop
# Obtaining a new certificate
# Performing the following challenges:
# http-01 challenge for demo.rcd.ai
# Waiting for verification...
# Cleaning up challenges
# Running post-hook command: service nginx start
#
# IMPORTANT NOTES:
#  - Congratulations! Your certificate and chain have been saved at:
#    /etc/letsencrypt/live/demo.rcd.ai/fullchain.pem
#    Your key file has been saved at:
#    /etc/letsencrypt/live/demo.rcd.ai/privkey.pem
#    Your cert will expire on 2019-06-26. To obtain a new or tweaked
#    version of this certificate in the future, simply run certbot
#    again. To non-interactively renew *all* of your certificates, run
#    "certbot renew"
#  - Your account credentials have been saved in your Certbot
#    configuration directory at /etc/letsencrypt. You should make a
#    secure backup of this folder now. This configuration directory will
#    also contain certificates and private keys obtained by Certbot so
#    making regular backups of this folder is ideal.
#    ...
Because this command stops and restarts Nginx, we should be able to go directly to the app and see something (https://demo.rcd.ai). We can also specifically request Nginx to reload the configuration.
nginx -s reload
Deploy the API
With the Nginx configuration expecting an internal server listening on port 1234, all that remains is running the Python server on the droplet. Because we pushed the code to GitHub, the remaining commands can be run from the droplet.
# Clone code to folder
cd /var/www
git clone https://github.com/rcdilorenzo/fastapi-react-demo.git demo-server

# Install Python-3.6 based virtualenv (to avoid version conflicts)
apt-get install -y python3.6-venv python3-venv python3.6-dev

# Jump into server folder
cd demo-server

# Create virtual environment in /var/www/demo-server/demo_3.6
python3.6 -m venv demo_3.6

# Install a couple of prerequisites for compiling some dependencies
./demo_3.6/bin/pip install wheel
apt-get install -y gcc

# Install dependencies
./demo_3.6/bin/pip install -r requirements.txt
With the dependencies installed, the server can be started inline for testing.
./demo_3.6/bin/uvicorn app.server:app --port 1234
WARNING:root:email-validator not installed, email fields will be treated as str.
To install, run: pip install email-validator
INFO:uvicorn:Started server process [9357]
INFO:uvicorn:Waiting for application startup.
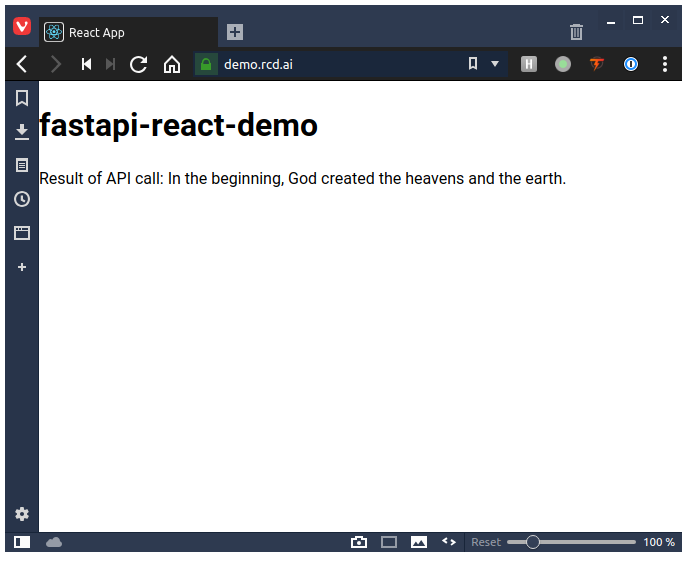
INFO:uvicorn:Uvicorn running on http://127.0.0.1:1234 (Press CTRL+C to quit)Revisiting the page, we can see that the verse now loads properly.
However, this Python server will only run while we have the SSH session open. To have it actually persist even across reboots, we can add in to the crontab. The only command we have to run is changing to the server root directory and running uvicorn. Kill the server with CTRL-c and open the crontab with crontab -e.
@reboot cd /var/www/demo-server && ./demo_3.6/bin/uvicorn app.server:app --port 1234Save and close that file. Restart the server with reboot. Once the droplet restarts, the application should be automatically started.
Conclusion
If you have come this far, then congratulations. 🎉 Go grab a coffee! This process may seem a bit tedious, but it shows that for only $5 a month you can have a production-level, interactive web app of your data project without forcing the data science process through a more narrow set of visualization tools. This level of flexibility certainly won't be necessary in many cases, but now you know how to set everything up for yourself.
There's much more that could be said on each one of these steps, but I wanted to focus on the primary workflow. Of course, updating the client or server requires a couple of commands, but that could easily be automated. If you really want a long term, production-ready system, deploying a CI/CD process with a team is certainly worth the time investment.